-
Do I really need anchors or bracing? If so, how many do I need? Which style do you recommend?
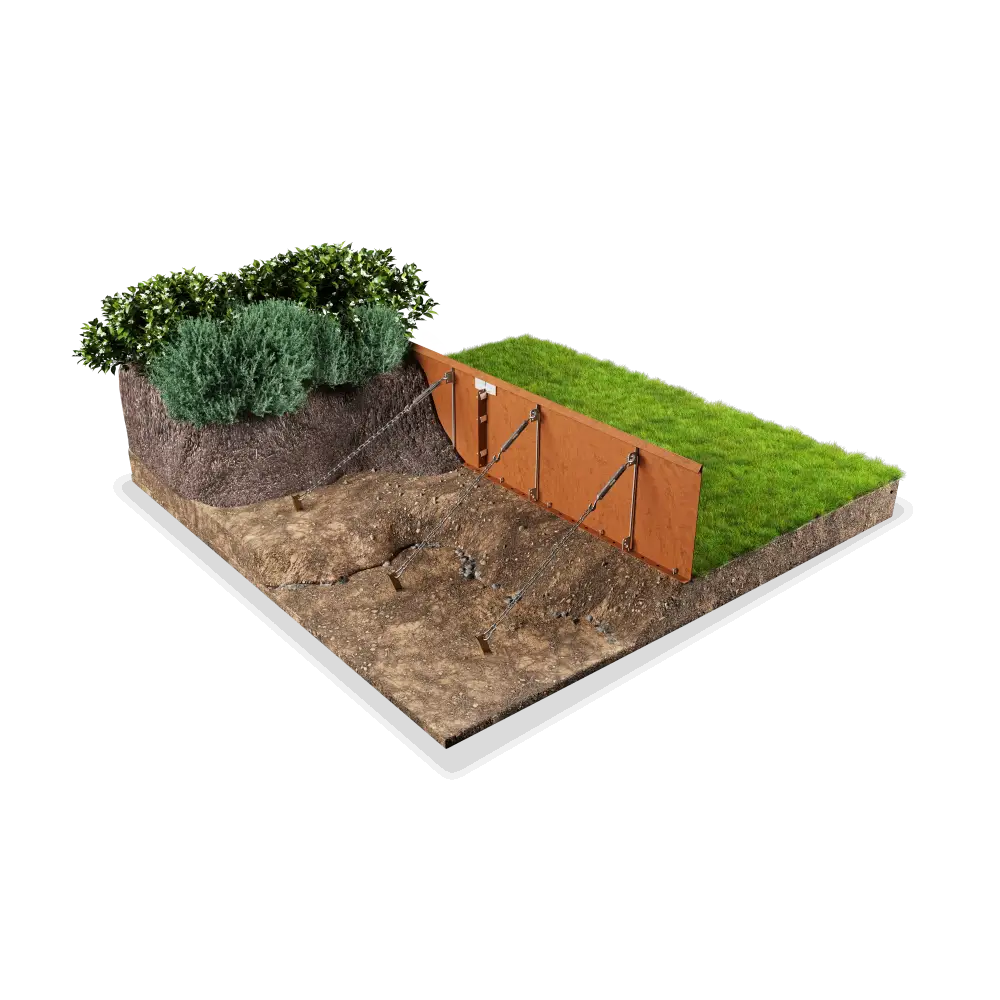
Yes, anchors/bracing are important to the long-term stability of the edging. In almost all cases, 2 per section is recommended.
There are 2 choices: 1. The universal turnbuckle style simply clips to the back of the edging bracket and is extended via a chain diagonally where a peg is pounded into the ground. 2. The anchor post is screwed to the side of the bracket on the back of the edging and pounded into the ground vertically.
The anchor post works well in normal soil conditions. Concrete should be used around the post. The universal turnbuckle brace works both in normal and soft ground conditions. Please note that in soft ground conditions, concrete is recommended around the peg and nails as well.
As far as ease of install. Neither is hard to install, but the Universal turnbuckle style is probably the easier of the 2 methods.
-
Can the rigid and flexible edging be joined together?
Yes, they both have the same connectors, so they can be joined together. In fact, the 9.5”, 15.75”, and 22” can all be connected together at the top. This helps in situation where there is a slope, and you need to bury a portion of the edging.
-
What type of saw should I use if I need to cut the edging?
The manufacturers recommend an angle grinder. The main point in selecting a saw to cut with is that it uses a metal cutting saw blade and that you are comfortable using it. If you are not comfortable using a saw, we highly recommend getting a professional’s assistance.
-
When do I need to use a joining sleeve?
Joining sleeves are used to reconnect edging that has been cut. If you cut the edging, therefore cutting off the pre-built-in connectors, and then need reconnect it to another piece and joining sleeve is used to re-join the pieces.
-
What is included in the price of a single section of edging?
Included in the price of the edging are 1 – 7-foot section, a joining plate to connect the edging to the next section, and 5 long twisted nails. Bracing/anchors, premade corners, and joining sleeves are purchased separately.
-
What are the dimensions of the pre-made corners?
Each arm of the corner is inches. So, 10 inches then a 90-degree bend and another 10 inches.
-
Is this product safe to use in vegetable gardens?
Yes, the edging is safe to use for vegetable gardens. Below are the minearls that make up the weathering steel edging:

-
What are the dimensions of the premade corners?
Hi,
Each arm of the corner is 10 inches.
Thanks
Erin
-
Do you need to bury the section panels below grade at all? I.E. for the 15.75'' wall, what should I plan for the finished height?
Hi,
There is no need to burry the edging. You can bury it, if your plans call for it, or to make it level, but installation does not require it. So, for the finished wall, a 15.75" would give you the entire height of the panel.
Thanks
Erin
-
how easily are the sections bent? Do you need special tools for this?
For both the rigid and flexline, to make a corner or angle you would need an angle grinder and mallet. We do also offer pre-made corners.
In this video, it shows you how to introduce corners in your edging using the angle grinder and mallet. Please note that although the video is titled with the 240mm edging (9.5") the same premise is used for all of the edging.
https://www.youtube.com/watch?v=GZ5iYUa-9LU
Please let me know if you have any additional questions!
Thanks
Erin


